Follow these streamlined steps for a secure and efficient corrugated steel facade installation.
Preparation is Key
Gather Tools/Materials: Corrugated steel panels, compatible fasteners (screws/washers), furring strips or girts, drill/driver, measuring tape, level, chalk line, safety glasses, gloves. Confirm all materials meet local building codes.
Measure & Plan: Calculate wall area precisely. Determine panel layout (horizontal or vertical), starting point, and fastener spacing according to manufacturer’s specifications and wind load requirements.
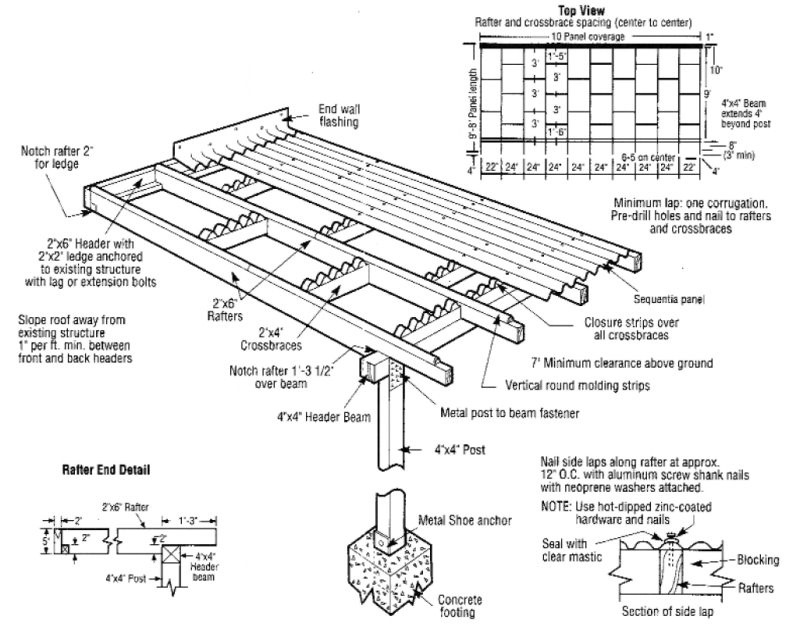
Substructure: Install a level, plumb, and properly spaced substructure (furring strips or steel girts) onto the wall framing. Ensure adequate anchoring to the structural wall.
Flashing & Membrane: Install required weather-resistant barrier (WRB) or building wrap over the substructure. Integrate flashing at penetrations, bottom, top, and sides as needed for water management.
Panel Installation
Starting Corner: Begin at a bottom corner. Use temporary supports or clips to hold the first panel perfectly plumb and level.
Fastening Technique: Drive fasteners vertically through the panel crown (high point of the corrugation) into the substructure beneath. Do not overtighten – the fastener head and washer should compress the panel sealant without distorting the metal. Maintain consistent spacing per specs.
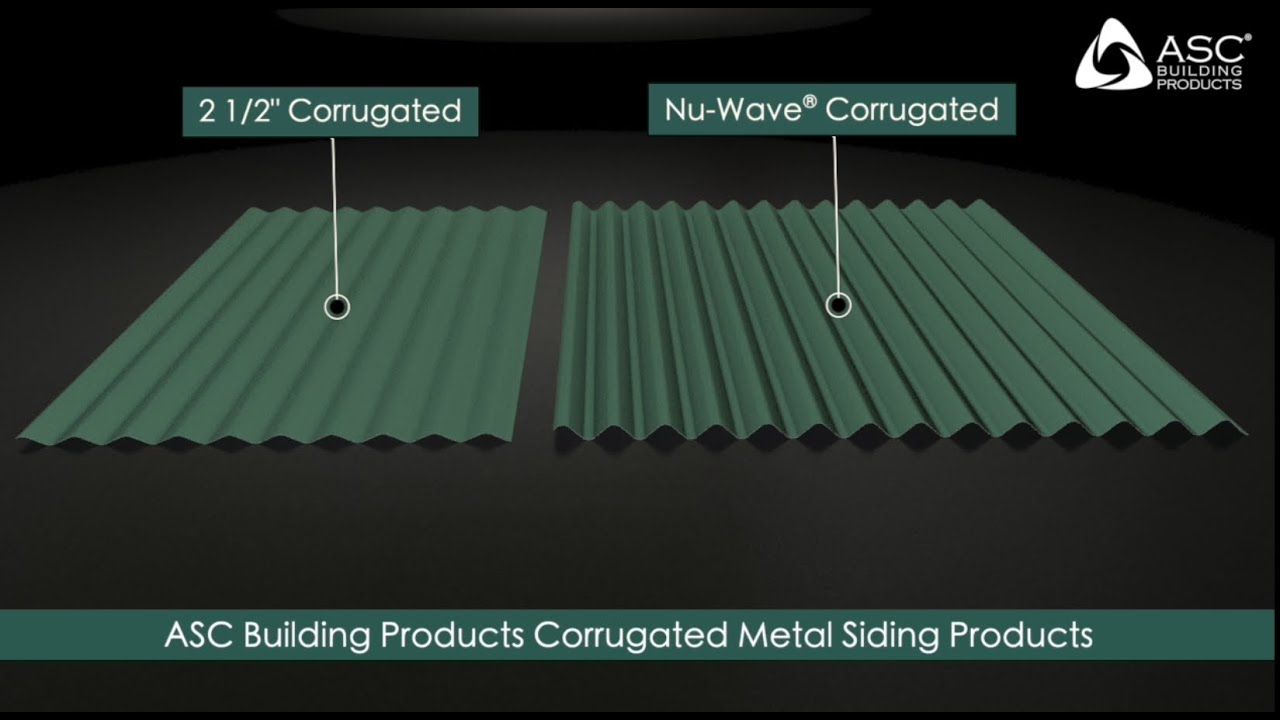
Overlapping Panels: Overlap adjacent panels by a minimum of one full corrugation (or as specified by the manufacturer). Ensure overlaps face away from prevailing wind/rain. Apply compatible sealant under end laps if required.
Subsequent Rows: Stagger end joints in adjacent rows by at least one panel width. Maintain continuous vertical alignment of panel joints.
Cutting: Use metal snips, a circular saw with a fine-tooth carbide blade, or a nibbler for precise cuts. Wear cut-resistant gloves and deburr all cut edges.
Critical Details
- Edge Conditions: Install proper trim profiles at corners, eaves, rakes, and penetrations for a clean finish and enhanced weather resistance.
- Expansion/Contraction: Allow for thermal movement. Fasten panels securely but avoid rigid restraints; elongated holes or slotted clips might be needed in some designs.
- Penetrations: Seal meticulously around pipes, vents, or window/door openings using manufacturer-recommended flashings and sealants.
Final Checks
Inspect the entire installation. Verify all fasteners are correctly seated (not under- or over-driven), all panels are securely fixed with no oil-canning, overlaps are consistent, and trim is properly installed. Check for debris or tool marks and clean carefully.