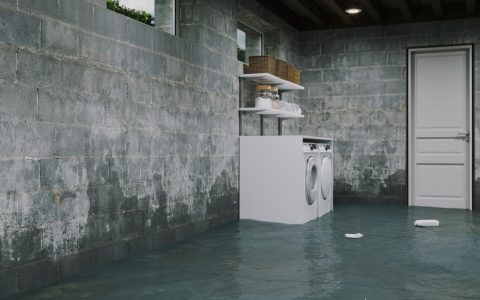
Waterproofing a concrete bathroom is critical to prevent structural damage and mold. Here are proven DIY steps:
Materials & Tools
- Concrete cleaner/etcher (acid-based for new concrete, alkaline for old)
- Stiff bristle brush & vacuum
- Hydraulic cement or epoxy injection kit (for active leaks/cracks)
- High-quality liquid waterproofing membrane (polyurethane or polymer-modified cementitious)
- Reinforcing fabric membrane (for corners/joints)
- Utility knife, trowel, quality brush/roller
- Sealant (100% silicone or polyurethane)
Step-by-Step Process
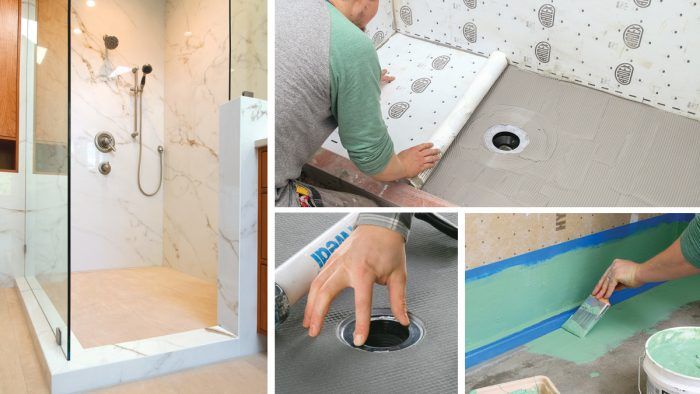
1. Surface Preparation (Most Crucial Step):
- Remove all existing finishes, adhesives, debris, and loose material. Surface must be structurally sound.
- Clean thoroughly using concrete cleaner/etcher according to manufacturer specs. Rinse multiple times with clean water until surface is dust-free and pH neutral. Allow to dry completely (minimum 24-48 hrs).
2. Repair Cracks & Holes:
- Identify and mark all cracks (>1mm width), holes, and spalled areas.
- Chase out cracks to a solid substrate using a grinder or chisel (min 1/4" wide, 1/4" deep "V" groove).
- Pack cracks and voids tightly with hydraulic cement (for active leaks) or flexible polyurethane crack sealant. Smooth flush.
3. Seal Joints & Corners:
- Apply a thick bead of appropriate sealant to internal corners, wall-to-floor junctions, and pipe penetrations.
- Immediately embed specialized reinforcing fabric membrane (min 3" wide) into the wet sealant. Press firmly to ensure full contact and zero air pockets. Feather edges. Allow to cure per sealant instructions.
4. Apply Liquid Membrane:
- Prime if required by membrane manufacturer (follow specs).
- Stir membrane thoroughly. Apply first coat using brush for corners/joints and roller on large surfaces. Ensure complete coverage, especially over sealed areas and fabric. Apply evenly without puddles. Follow product's recommended coverage rate.
- Allow first coat to cure touch-dry (time varies per product/environment - crucial!).
- Apply second perpendicular coat immediately after touch-dry. Ensure total minimum dry film thickness meets manufacturer specs (often 15-20 mils minimum, measured with wet film gauge). Pay extra attention to penetrations.
- Allow full cure time (usually 48-72+ hours) before subjecting to water or installing finishes.
Critical Success Factors
- Perfect Surface Prep: Membrane adhesion fails on dirt, dust, or grease.
- Flexible Sealing at Movement Areas: Reinforced joints are non-negotiable.
- Achieving Membrane Thickness: Two thin coats ≠ one thick coat. Measure wet film thickness.
- Full Cure: Premature water exposure compromises integrity.
Always follow the specific instructions of your chosen waterproofing products. Never skip steps or rush curing. Test integrity by flooding contained area (e.g., shower pan) for 24 hours before tiling.